DIY seven-pointed Advent star

You can download this as a pdf that you can print here.
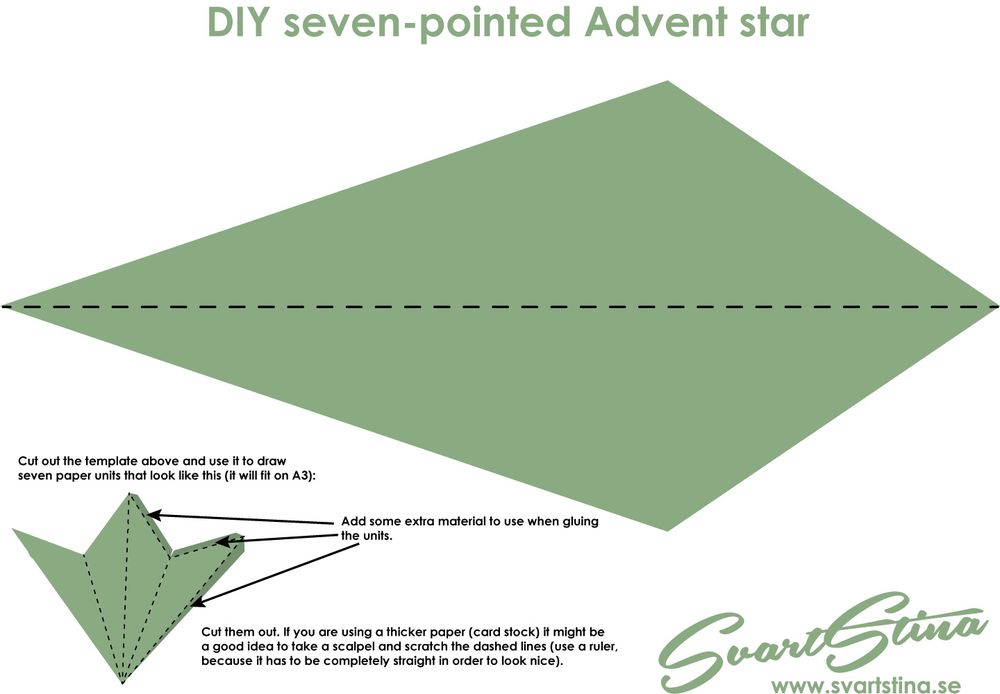
You will need:
* Paper (I used a white A3-drawing paper, maybe 120 g/m2. But a nice card stock paper would look even better)
* Scissors
* Something sharp like a scalpel to scratch the dashed folding lines if you are using a thicker paper
* A revolving hole punch for decorating with small holes
* Glue
* A cutting board
* A ruler
* Pen
* Some tape and clips (I used hair clips, but anything that will hold the star together before the glue has dried will do)
* LED light with batteries
* String to hang the star
Glue every point individually and secure with hair clips so they don´t open up before dry. Punch holes in the pattern you want (I chose to keep it simple and only punch straight lines)

Make seven units. When they have dried you glue them together. The last two units are a bit difficult, so some patients will be needed... Leave the last opening as it is - you need somewhere to put in the LED-lights. I tried to distribute the light evenly in the points. Then I taped the last opening together with some transparent tape (so that you will be able to open it again and change the batteries later).
You can vary the star endlessly - make it different types of paper like gold, silver or color. Cut out shapes/swirls instead of punching holes.

Here´s a golden version I made...
Blev tillfrågad om en engelskspråkig tutorial, men vill du hellre läsa på svenska så hittar du mer info om stjärnorna här: